
Discover the convenience of creating your own domino table with detailed PDF plans. These guides provide step-by-step instructions, material lists, and customizable designs for all skill levels, ensuring a smooth and enjoyable building experience.
1.1 What is a Domino Table?
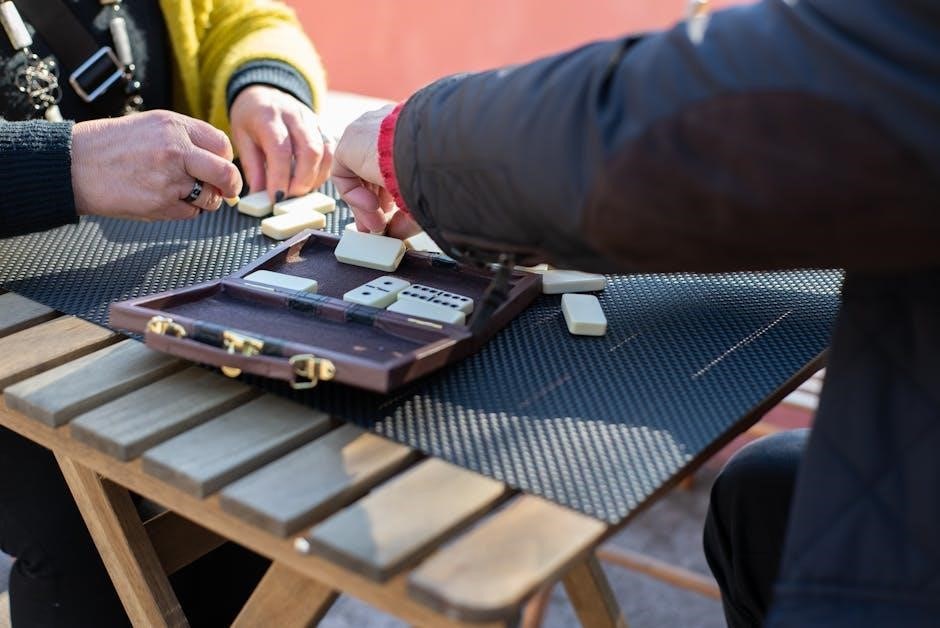
A domino table is a flat, smooth surface designed specifically for playing dominoes. Typically made of wood, it features a durable finish and rounded edges for comfort. The table often includes storage compartments for domino tiles and cups for scoring. Its design prioritizes stability and evenness, ensuring fair gameplay. Whether for casual gatherings or competitive matches, a domino table is an essential piece for enthusiasts, offering both functionality and style.
1.2 Why Build Your Own Domino Table?
Building your own domino table offers cost savings, customization, and a sense of accomplishment. With PDF plans, you can create a durable, personalized table tailored to your needs and space, ensuring it stands out and meets your specific preferences while enjoying the satisfaction of a DIY project.
1.3 Benefits of Using PDF Plans
Using PDF plans for your domino table offers clarity, precision, and convenience. These files provide detailed, downloadable instructions, material lists, and diagrams, ensuring accuracy. PDF plans are cost-effective, saving time and effort by avoiding trial and error. They often include customizable designs, catering to various skill levels and preferences. Plus, they’re easily accessible and sharable, making your DIY project enjoyable and stress-free. This format is ideal for achieving professional results at home.

Materials Needed for Building a Domino Table
Essential materials include high-quality wood, durable hardware, and finishes. Detailed PDF plans outline specific requirements, ensuring a sturdy and polished domino table for lasting enjoyment.
2.1 Wood Selection: Types and Quality
Selecting the right wood is crucial for durability and aesthetics. Oak, maple, and pine are popular choices due to their strength and workability. For a classic look, oak offers a sturdy, timeless appeal, while maple provides a smooth, scratch-resistant surface. Pine is cost-effective but may require additional finishing. Ensure the wood is properly seasoned to avoid warping. Opt for knot-free or minimal knot wood for a professional finish. Consider sustainability and budget when choosing your materials for the domino table.
2.2 Hardware Requirements
Essential hardware for building a domino table includes screws, bolts, and hinges for secure assembly. Table legs require sturdy brackets or bolts to ensure stability. Adding a folding mechanism involves hinges and latches, while storage compartments may need drawer slides; Levelers or adjustable feet are crucial for balancing the table on uneven surfaces. Proper hardware ensures durability and functionality, making it vital to select high-quality components that align with your design and usage needs.
2.3 Additional Materials for Finishing
For a polished look, gather sandpaper, paint, varnish, or polyurethane. Add protective coatings like wax or sealants to shield the surface from spills and wear. Include decorative elements such as stains or decals for customization. Ensure proper drying time between coats for a durable finish. These materials enhance the table’s aesthetic appeal and longevity, making it ready for years of enjoyable gameplay.
Tools Required for Construction
To build a domino table, you’ll need essential power tools like circular saws and drills, plus hand tools such as screwdrivers and wrenches. Clamps, measuring tapes, and sandpaper are also crucial for a polished finish.
3.1 Essential Power Tools
To build a domino table, essential power tools include a circular saw for cutting wood planks, a drill press for precise hole drilling, and an orbital sander for smoothing surfaces. A jigsaw may be needed for curved cuts, while a router can add decorative edges. These tools ensure accuracy and efficiency in constructing the table’s components, such as the table top and legs, and are crucial for achieving a professional finish.
3.2 Hand Tools and Accessories
Essential hand tools include a tape measure, hammer, screwdrivers, and clamps for securing pieces. Sanding blocks and chisels help refine surfaces and joints. A pencil and marker are vital for marking cuts and alignments. Safety gloves and goggles protect during construction. Additional accessories like wood glue, fasteners, and filler enhance the build process. These tools ensure precision, safety, and efficiency, making them indispensable for achieving professional-quality results when following domino table plans PDF guides.

Safety Precautions and Guidelines
Always wear protective gear like gloves and safety glasses during construction. Ensure the table is used on a stable, even surface to prevent accidents. Follow all power tool safety guidelines and keep children away during assembly.
4.1 Safety Measures During Construction
Ensure a safe building process by wearing protective gear like gloves and safety glasses. Keep loose clothing tied back and avoid jewelry that could catch on tools. Always operate power tools in a well-ventilated area, following the manufacturer’s guidelines. Maintain a clean workspace to prevent tripping hazards and ensure proper lighting. Use clamps to secure materials during cutting or drilling, and never leave sharp edges exposed. Regularly inspect tools for damage and keep a first-aid kit nearby. Store materials and tools properly after each session to avoid accidents.
4.2 Usage Guidelines for the Finished Table
To ensure longevity, place the table on a stable, even surface and avoid exposure to direct sunlight or moisture. Clean the surface regularly with a soft cloth and mild detergent. Avoid using abrasive cleaners or harsh chemicals. For games, ensure dominoes are handled carefully to prevent scratching. Store the table in a dry, cool environment when not in use. Regularly inspect the legs and surface for damage and address any issues promptly to maintain stability and appearance.
Step-by-Step Construction Plans
Begin by cutting and assembling the table top, ensuring precise measurements. Next, construct the legs and frame, securing them with sturdy hardware. Finally, attach the legs and install levelers for stability and evenness.
5.1 Cutting and Assembling the Table Top
Begin by cutting the wood according to the specified dimensions in your PDF plans. Use a circular saw or jigsaw for precise cuts. Sand the edges to ensure smoothness. Assemble the table top by aligning the pieces carefully, using wood glue and clamps to secure them. Allow the glue to dry completely before proceeding. Ensure the surface is even and sturdy for optimal gameplay; Follow the plans for any additional reinforcement or finishing touches before attaching the legs.
5.2 Building the Table Legs and Frame
Cut the wood for the legs and frame according to your PDF plan specifications. Assemble the legs using screws or brackets for durability. Attach the frame to the legs, ensuring stability and alignment. Use clamps to hold pieces in place while securing them. Sand all edges for a smooth finish. Install levelers on the legs for balanced support on uneven surfaces. Double-check measurements and alignment to ensure the structure is sturdy and even before attaching the table top.
5.3 Attaching the Legs to the Table Top
To securely attach the legs to the table top, align each leg with the pre-drilled holes or brackets. Use high-strength bolts or screws, tightening gradually to ensure even pressure. For added stability, install levelers on each leg, adjusting them to balance the table on uneven surfaces. Double-check the alignment and tighten all connections firmly. This step ensures a sturdy and level playing surface, essential for an enjoyable domino gaming experience.
5.4 Installing Levelers for Stability
Ensure your domino table remains stable on any surface by installing levelers. Attach adjustable feet or small leveling pads to each leg using screws or bolts. This allows you to adjust the table’s balance on uneven floors. For added stability, use a spirit level to ensure the table is perfectly aligned. Secure the levelers tightly to prevent movement during gameplay. This simple step guarantees a wobble-free surface, enhancing the overall playing experience and protecting the table from potential damage.
Design and Customization Options
Personalize your domino table with customizable dimensions, folding mechanisms, and surface designs. Add storage compartments or a scoring system for enhanced functionality and a unique appearance.
6.1 Choosing the Right Dimensions
Selecting the appropriate dimensions for your domino table is crucial for optimal gameplay and comfort. A standard table typically measures 21 inches in width and 43 inches in length, accommodating the standard domino tile size of 2×4.5 cm. Consider the height, ideally between 28 and 30 inches, to ensure players can sit comfortably. For portability, folding designs may reduce the overall size. Customize dimensions based on space availability and user preferences while maintaining playability and aesthetic appeal.
6.2 Adding a Folding Mechanism
Enhance your domino table’s versatility by incorporating a folding mechanism, perfect for space-saving storage and easy transport. Use hinges and latches to create a sturdy, collapsible design. Ensure the folding joints are reinforced for durability. Choose from various hinge types, such as piano hinges or hidden mechanisms, to match your table’s style. Attach levelers to maintain stability on uneven surfaces. This feature is ideal for outdoor or multi-functional spaces, making your domino table both practical and convenient for any setting.
6.3 Customizing the Table Surface
Personalize your domino table by adding unique finishes or designs to the surface. Consider using felt for a smooth playing experience or incorporate a wood grain pattern for a rustic look. You can also add a scoring system or engraved lines for gameplay accuracy. For extra flair, apply custom decals or paint to match your home decor. Protective coatings ensure durability, while optional features like cup holders or trays enhance functionality. These touches make your table stand out and cater to your personal style or gaming needs.

Finishing Touches
Sand the surface for a smooth finish, apply paint or varnish for protection, and add a protective coating to enhance durability and appearance of your domino table.
7.1 Sanding and Smoothing the Surface
Sanding is essential for achieving a polished finish. Begin with coarse-grit sandpaper (120-150 grit) to remove imperfections, then progress to finer grits (220-240) for a smooth surface. Always sand in the direction of the wood grain to avoid scratches. After sanding, use a vacuum or damp cloth to remove dust. For an extra-smooth finish, apply a sanding block to ensure even pressure. A well-sanded surface ensures better adhesion of paint or varnish and enhances the table’s durability and appearance.
7.2 Applying Paint or Varnish
For a polished finish, apply paint or varnish to your domino table. Start with a high-quality primer to ensure even coverage. Use a paintbrush or roller to coat the surface, allowing each layer to dry completely. Varnish adds durability and enhances the wood grain. Apply thin coats, sanding lightly between layers for a smooth finish. Ensure the table is in a well-ventilated area to prevent fumes from building up. Allow the final coat to cure fully before use for long-lasting protection and a professional appearance.
7.3 Adding Protective Coatings
Protect your domino table from spills and wear by applying a durable protective coating. Start with a high-quality varnish or polyurethane, ensuring the surface is clean and dry. Apply evenly with a brush, following the manufacturer’s instructions. Allow the first coat to dry completely before adding a second layer for maximum protection. Avoid using harsh chemicals or abrasive cleaners, as they may damage the finish. Regularly wiping the surface with a soft cloth will maintain its appearance and longevity.
Budget and Time Considerations
Building a domino table is cost-effective, with materials often under $200. Completion typically takes 2-4 days, depending on design complexity and craftsmanship skill level.
8.1 Estimated Cost Breakdown
The estimated cost for building a domino table includes materials like wood, hardware, and finishes. Lumber for the table top and legs typically ranges between $50-$100. Hardware such as screws, hinges, and levelers may cost $20-$30. Additional materials for finishing, like paint or varnish, can add $15-$25. Optional features, such as a folding mechanism or storage compartments, may increase the total by $30-$50. Overall, the project can be completed for $125-$250, depending on customization and material quality.
8.2 Time Required for Completion
Building a domino table typically takes 12-20 hours, depending on complexity. Cutting and assembling the table top and legs take 4-6 hours, while sanding and finishing require 4-5 hours. Additional time is needed for drying varnish or paint. Customization, like adding levelers or a folding mechanism, can add 2-4 hours. Beginners may need more time to ensure accuracy, while experienced builders can complete it faster. Plan accordingly to enjoy your custom table for years of gameplay.

Advanced Features and Upgrades
Elevate your domino table with storage compartments, scoring systems, or a removable top. These upgrades enhance functionality and customization, offering a professional-grade setup for enthusiasts and casual players alike.
9.1 Adding Storage Compartments
Add functionality to your domino table with built-in storage compartments. These can be designed as drawers or shelves to store dominoes, scoreboards, and accessories. PDF plans often include cutouts and assembly instructions for compartments, ensuring a neat and organized space. This feature enhances usability and keeps essentials within easy reach, making your table both practical and visually appealing for gaming sessions.
9.2 Incorporating a Scoring System
Add a practical feature to your domino table with a built-in scoring system. This can be achieved by installing a sliding scorer or a recessed area for tracking points. Use materials like wood or metal for durability. Pre-designed PDF plans often include templates for such additions, making installation straightforward. Customize the design to match your table’s aesthetic, ensuring it enhances gameplay while maintaining a professional finish. This feature is perfect for competitive players seeking a seamless way to keep track of scores during games.
9.3 Adding a Removable Top
Enhance your domino table’s versatility by incorporating a removable top. This feature allows for easy transportation and storage, making it ideal for outdoor or multi-use spaces. Use hinges and latches to secure the top, ensuring stability during play. Customize the design to fit your needs, with options for different materials or finishes. Detailed PDF plans provide measurements and assembly instructions, guiding you through the process seamlessly. This upgrade adds functionality while maintaining the table’s aesthetic appeal and durability.
Troubleshooting Common Issues
Address wobbling tables by tightening loose joints or adjusting leg levelers. Fix uneven surfaces with sanding or shimming. Repair scratches or dents in the finish promptly to maintain durability.
10.1 Addressing Uneven Surfaces
If your domino table has uneven surfaces, start by checking the legs for levelness. Attach adjustable levelers to each leg to ensure stability on any surface. For minor unevenness, shim the legs with thin, sturdy materials like wood or plastic. Always test the table’s balance after adjustments. If the issue persists, sand the table surface or reassemble the legs to ensure proper alignment. Regularly inspect and tighten joints to maintain evenness and prevent wobbling during gameplay.
10.2 Fixing Loose Joints
To address loose joints in your domino table, start by assessing the severity of the looseness. If the joint is slightly loose, tighten the screws or bolts. For more significant issues, disassemble the joint and apply wood glue. Clamp the pieces firmly and let the glue dry completely. If screws are stripped, consider drilling new pilot holes or using dowels for added strength. Allow the repair to cure fully before reusing the table to ensure stability and durability.
10.3 Repairing Damaged Finishes
To repair damaged finishes on your domino table, start by sanding the affected area to smooth out scratches or chips. Use fine-grit sandpaper for an even surface. Clean the area thoroughly with a damp cloth to remove dust and debris. Apply a matching varnish or polyurethane finish, allowing each coat to dry completely before adding another; For optimal results, consider using a primer first and finish with a protective coating to prevent future damage. Ensure good ventilation and safety precautions during the process.
Maintenance and Upkeep
Regularly clean the table surface with a soft cloth and avoid harsh chemicals. Apply protective coatings to maintain durability and prevent damage from spills or scratches.
11.1 Cleaning the Table Surface
Regular cleaning ensures your domino table remains in pristine condition. Use a soft, damp cloth to wipe the surface, avoiding harsh chemicals or abrasive materials. For varnished or painted finishes, a mild detergent solution can be used. Avoid excessive moisture, as it may damage the wood or finish. Dry the surface thoroughly after cleaning to prevent water spots. For stubborn stains, lightly sand the area before reapplying a protective coat. Always clean before and after use to maintain the table’s durability and appearance. Regular maintenance ensures longevity and optimal playability.
11.2 Regular Maintenance Tips
Regularly clean the table surface with a soft cloth to prevent dust buildup. Apply a wood polish or wax to maintain its finish and protect it from spills. Avoid using harsh chemicals, as they may damage the material. Check for loose joints and tighten them if necessary. For outdoor tables, consider applying a water-repellent finish to withstand weather conditions. Store the table in a dry place when not in use to ensure longevity and optimal performance.
Creating a custom domino table offers immense satisfaction and savings. With detailed PDF plans, you’ll gain confidence to craft a durable, personalized piece for endless gaming enjoyment—start building today!
12.1 Final Thoughts on Building a Domino Table
Completing your domino table is a rewarding achievement that combines creativity and practicality. The process not only enhances your woodworking skills but also provides a durable, customizable piece for years of enjoyment. Whether for family gatherings or competitive play, your handmade table will stand out, reflecting your personal style and craftsmanship. Take pride in your accomplishment and consider exploring advanced features or future projects to further showcase your DIY expertise.
12.2 Encouragement to Start Your Project
Embrace the joy of creation and start your domino table project today! With detailed PDF plans, you’ll have clear guidance to bring your vision to life. Whether you’re a seasoned craftsman or a DIY enthusiast, these plans are designed to be accessible and rewarding. Imagine the satisfaction of gathering around a table you built yourself, sharing laughter and games with loved ones. Don’t wait—gather your materials, dive into the instructions, and watch your project transform from idea to reality!