
Cove Dishwasher Manual: A Comprehensive Guide
This manual provides detailed instructions for optimal Cove dishwasher performance, covering installation, operation, maintenance, and troubleshooting for all models․
Understanding Your Cove Dishwasher
Your Cove dishwasher represents a significant investment in kitchen technology, designed for superior cleaning and quiet operation․ This section aims to familiarize you with its core functionalities and features․ Cove dishwashers are engineered with advanced wash systems, utilizing precision jets and optimized water filtration to deliver sparkling results․
Before initial use, carefully review this manual to understand the dishwasher’s capabilities and limitations․ Pay close attention to loading guidelines, detergent recommendations, and cycle selections․ Proper usage ensures longevity and peak performance․ Understanding the model number and serial number location (detailed later in this guide) is crucial for accessing support and warranty information․ Cove prioritizes both performance and user experience, offering a streamlined interface and intuitive controls․ Familiarizing yourself with these elements will unlock the full potential of your appliance․
Model and Serial Number Location
Locating your Cove dishwasher’s model and serial number is essential for warranty claims, service requests, and accessing specific product information․ These numbers uniquely identify your appliance and are crucial for accurate support․ The Model Number Tag, as indicated in official documentation, is the primary location for this information․
You will find this tag affixed to the appliance itself․ Typically, it’s situated within the dishwasher door frame, often along the side or top edge when the door is fully opened․ The serial number is printed directly alongside the model number on this tag․ Carefully record both numbers in a safe place for future reference․ Having this information readily available will expedite any service interactions and ensure you receive the correct parts or assistance tailored to your specific Cove dishwasher model․
Decoding the Model Number
Understanding the Cove dishwasher model number provides insights into the appliance’s features and specifications; While a comprehensive breakdown isn’t publicly available, the alphanumeric code offers key identifiers․ The initial characters, such as “DW,” clearly denote “Dishwasher,” establishing the appliance type․ Subsequent digits and letters represent specific characteristics like width – indicated by “24” for a 24-inch model – and potentially internal configurations․
Although a detailed key isn’t broadly published, the model number assists in pinpointing compatible parts and accessing tailored documentation․ It’s vital when contacting customer service or ordering replacements․ Referencing the complete model number ensures accurate identification, preventing delays and incorrect part shipments․ While the intricacies remain proprietary, the model number serves as a unique identifier for your Cove dishwasher, streamlining support and maintenance processes․
Electrical Specifications and Power Requirements
Cove dishwashers require a dedicated 120-volt, 60Hz electrical circuit, typically with a 15-amp breaker․ Proper electrical connection is crucial for safe and efficient operation․ Avoid using extension cords or adapters, as they can compromise performance and pose a safety hazard․ The dishwasher must be grounded according to local electrical codes․
Before installation, verify your home’s electrical system meets these requirements․ Incorrect wiring can lead to malfunction or damage․ Consult a qualified electrician if you are unsure about any aspect of the electrical connection․ The power consumption will vary slightly depending on the specific model and cycle selected, but generally falls within a standard range for residential dishwashers․ Always disconnect power before performing any maintenance or repairs․
Initial Setup and Installation
Proper installation ensures optimal performance and longevity․ This involves connecting the water supply, installing the drain hose, and verifying electrical connections are secure․
Water Supply Connection
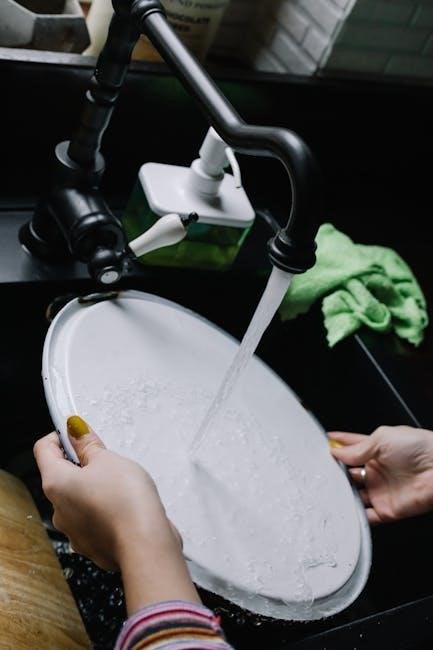
Connecting the water supply is a crucial step in the installation process․ Ensure a dedicated hot water line is used, as this maximizes cleaning performance․ A 3/8-inch compression fitting is typically required for connection to the dishwasher’s inlet valve․ Before connecting, thoroughly flush the water line to remove any debris or sediment that could potentially clog the valve․
Always use new supply hoses; do not reuse old ones․ Wrap the threaded connections with Teflon tape to prevent leaks․ Carefully tighten the fittings, avoiding over-tightening, which can damage the valve or hose․ After connection, slowly turn on the water supply and meticulously check for any leaks at the connection points․ If leaks are detected, immediately shut off the water and re-tighten the fittings or replace the Teflon tape․ Proper water pressure is essential for optimal dishwasher operation; refer to the electrical specifications section for recommended pressure ranges․
Drainage Installation
Proper drainage is vital for preventing water buildup and ensuring efficient dishwasher operation․ The drain hose, typically 5/8-inch in diameter, must be connected to a household drain with an air gap․ An air gap prevents wastewater from flowing back into the dishwasher, maintaining sanitation․ Avoid connecting the drain hose directly into a garbage disposal unless a knockout plug has been removed; otherwise, it could cause backups․
Securely clamp the drain hose to the drain connection to prevent accidental dislodgement․ Ensure the hose is not kinked or crushed, as this restricts water flow․ The drain hose should be elevated between the dishwasher and the drain connection, typically at least 20 inches high, to facilitate gravity drainage․ Regularly inspect the drain hose for any signs of damage or blockage․ If a blockage occurs, disconnect the hose and flush it with water to remove any obstructions․
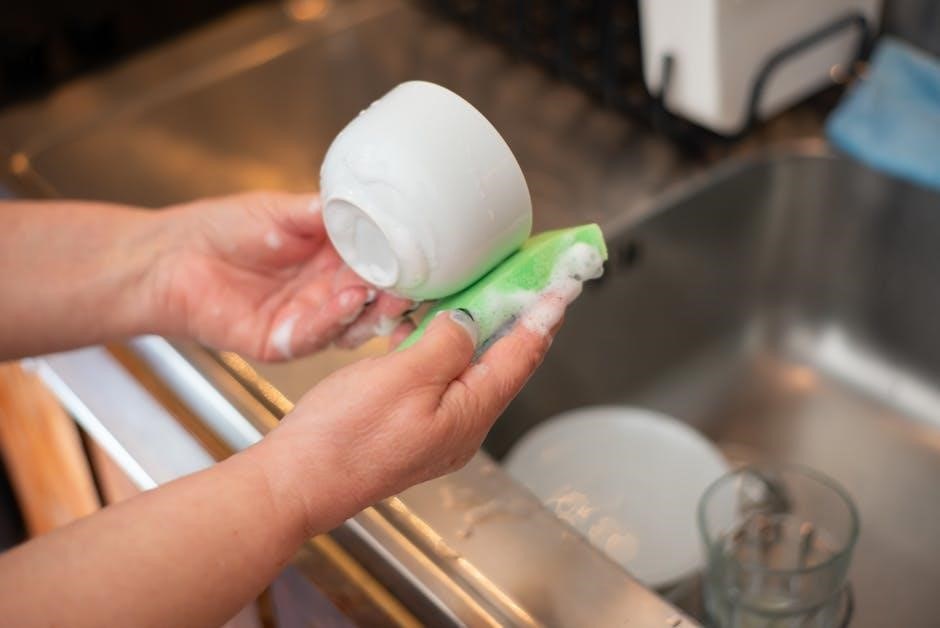
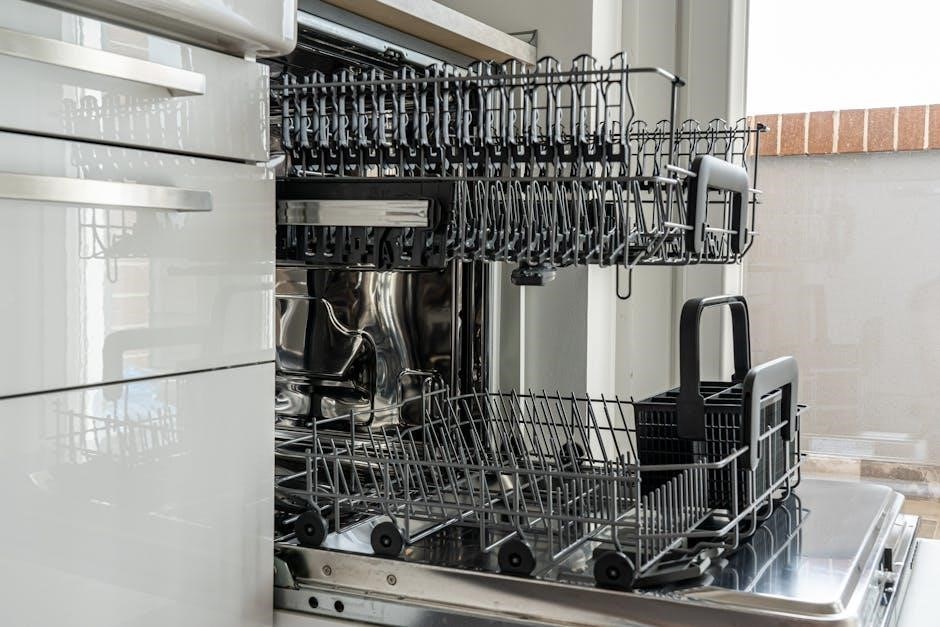
Loading Your Cove Dishwasher Correctly
Optimal loading maximizes cleaning performance and prevents damage to your dishes․ Arrange items so water can reach all surfaces; avoid overcrowding․ Place larger items on the lower rack, such as pots, pans, and baking dishes, facing the spray arm․ Ensure tall items don’t block the upper rack’s spray arm rotation․
The upper rack is designed for glasses, cups, and smaller items․ Secure delicate glassware to prevent movement during the wash cycle․ Silverware should be loaded in the silverware basket with handles down for thorough cleaning․ Alternate utensil placement to avoid nesting․ Avoid placing plastics directly over heating elements․ Check that nothing protrudes through the bottom of the rack, obstructing the lower spray arm․ Proper loading ensures efficient water circulation and sparkling clean results․
Operating Your Cove Dishwasher
This section details the dishwasher’s controls and cycles, ensuring efficient and effective cleaning․ Familiarize yourself with the panel for optimal performance and results․
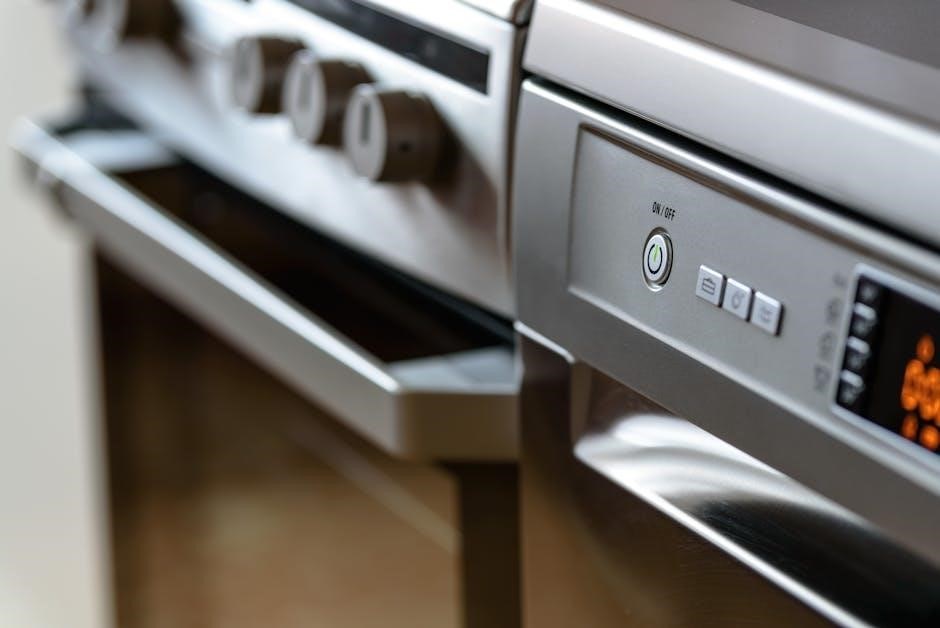
Control Panel Overview
The Cove dishwasher control panel is designed for intuitive operation, offering a range of customizable settings to suit your specific dishwashing needs․ At the heart of the panel is the power button, initiating or halting the wash cycle․ Adjacent to this, you’ll find the cycle selection dial, allowing you to choose from pre-programmed washes like Normal, Heavy, Delicate, and Quick․
Further options include modifications for wash temperature, rinse aid level, and the inclusion of sanitize features․ A digital display clearly indicates the selected cycle, remaining time, and any active error codes․ Dedicated buttons provide access to advanced functions such as Delay Start, enabling you to schedule washes for off-peak hours․ The panel also features indicators for low rinse aid and detergent levels, ensuring optimal cleaning performance․ Understanding each button and display element is crucial for maximizing your Cove dishwasher’s capabilities․
Wash Cycle Selection
Cove dishwashers offer a variety of wash cycles designed to handle different types of loads and soil levels․ The Normal cycle is ideal for everyday dishware with moderate food residue, providing a balance of cleaning power and energy efficiency․ For heavily soiled pots and pans, the Heavy cycle utilizes increased water pressure and temperature․
Delicate cycle provides a gentle wash for fragile items like glassware and china, minimizing the risk of breakage․ The Quick cycle offers a faster wash for lightly soiled dishes when time is limited․ A Sanitize cycle utilizes high temperatures to eliminate bacteria and germs, ensuring hygienic cleaning; Additionally, an Auto cycle intelligently adjusts wash parameters based on soil sensors․ Selecting the appropriate cycle ensures optimal cleaning performance and protects your valuable dishware․
Detergent Usage Guidelines
Proper detergent usage is crucial for achieving sparkling clean dishes․ Cove dishwashers are compatible with both powder, gel, and tablet detergents․ However, always use a detergent specifically formulated for automatic dishwashers; hand dish soap will create excessive suds and potentially damage the appliance․
The amount of detergent needed depends on water hardness and soil level․ Refer to the detergent manufacturer’s instructions for recommended dosage․ Generally, 1-2 tablespoons of powder or gel, or one detergent tablet, are sufficient for a full load․ Avoid overfilling the detergent dispenser, as this can leave residue on dishes․ For hard water areas, consider using a rinse aid to enhance drying and prevent spotting․ Ensure the detergent is fresh and stored in a cool, dry place to maintain its effectiveness․
Using Rinse Aid
Rinse aid significantly improves drying performance and prevents water spots, especially in hard water conditions․ Cove dishwashers feature an automatic rinse aid dispenser․ To fill the dispenser, locate it within the detergent compartment and carefully pour rinse aid until the indicator window shows full․
The rinse aid dispenser has adjustable settings to control the amount dispensed․ Start with the middle setting and adjust as needed based on your water hardness and desired results․ If you notice spotting or streaking, increase the setting․ Conversely, if residue appears on dishes, decrease the setting․ Regularly check the rinse aid level and refill as necessary to maintain optimal performance․ Using rinse aid contributes to brighter, cleaner dishes and reduces the need for hand-drying, saving you time and effort․
Maintenance and Cleaning
Regular cleaning ensures peak performance and longevity of your Cove dishwasher․ This section details filter cleaning, spray arm inspection, and exterior care procedures․
Filter Cleaning Procedures
Maintaining a clean filter is crucial for optimal dishwasher performance․ Food particles and debris can accumulate, leading to reduced cleaning effectiveness and potential drainage issues․ Cove dishwashers typically feature a multi-stage filtration system, often including a coarse filter and a fine filter․
To clean the filters, first, ensure the dishwasher is turned off and unplugged for safety․ Locate the filter assembly, usually at the bottom of the dishwasher tub․ Remove the lower rack to access it easily․ Twist or lift the filter components to unlock and remove them․
Rinse the filters thoroughly under warm running water, using a soft brush to dislodge stubborn food particles․ Avoid using harsh detergents or abrasive cleaners, as these can damage the filter material․ Inspect the filters for any cracks or damage; replace them if necessary․ Reassemble the filters correctly, ensuring they are securely locked into place before restoring power and resuming operation․ Regular filter cleaning – ideally monthly – will keep your Cove dishwasher running smoothly․
Spray Arm Inspection and Cleaning
Proper spray arm function is essential for thorough dish cleaning․ Over time, mineral deposits and food particles can clog the spray arm nozzles, reducing water pressure and hindering cleaning performance․ Cove dishwashers utilize multiple spray arms – upper, lower, and sometimes a dedicated utensil spray arm – to ensure comprehensive coverage․
To inspect and clean the spray arms, first, disconnect power to the dishwasher․ Carefully remove the spray arms; they usually snap or unscrew off․ Examine the nozzles for any blockages․ Use a toothpick or small wire to gently clear any obstructions․ Rinse the spray arms thoroughly under warm water to remove loosened debris․
Check the spray arm for cracks or damage; replace if necessary․ Ensure the spray arms rotate freely after cleaning․ Reattach the spray arms securely, verifying they are properly aligned․ Regular inspection and cleaning – every few months – will maintain optimal spray arm function and ensure sparkling clean dishes with your Cove dishwasher․
Exterior Cleaning Instructions
Maintaining a clean dishwasher exterior enhances its appearance and prevents buildup․ Cove dishwashers feature stainless steel or panel-ready finishes, requiring specific cleaning approaches to avoid damage․ For stainless steel models, use a dedicated stainless steel cleaner and a soft microfiber cloth, wiping with the grain to prevent streaks․
Avoid abrasive cleaners, scouring pads, or harsh chemicals like bleach, as these can scratch or discolor the surface․ For panel-ready models, clean the integrated panel according to the manufacturer’s instructions for that specific material (wood, laminate, etc․)․ Regularly wipe down the control panel with a damp cloth to remove fingerprints and smudges․
Pay attention to the handle and edges, where grime tends to accumulate․ A mild dish soap solution can be used for general cleaning, followed by a clean water rinse and drying with a soft cloth․ Consistent exterior cleaning preserves the beauty and longevity of your Cove dishwasher․

Troubleshooting Common Issues
This section details solutions for frequent problems, including starting failures, poor cleaning, leaks, and error codes, ensuring your Cove dishwasher operates efficiently․
Dishwasher Not Starting
If your Cove dishwasher fails to start, begin by verifying the power supply․ Ensure the dishwasher is properly plugged into a functioning electrical outlet․ Check your home’s circuit breaker or fuse box to confirm the circuit hasn’t tripped or blown․ A reset may be necessary․
Next, examine the dishwasher’s control panel․ Confirm that the door is fully latched, as a safety mechanism prevents operation if the door isn’t securely closed․ Also, verify that a wash cycle has been selected and the ‘Start’ button has been pressed․ Some models feature a ‘Delay Start’ function; ensure it isn’t activated unintentionally․
If these steps don’t resolve the issue, inspect the water supply valve․ The dishwasher won’t start if there’s insufficient water pressure․ Finally, consult the error code display (if applicable) as it may pinpoint the specific problem․ If problems persist, contact authorized Cove service for assistance․
Poor Cleaning Performance
Experiencing unsatisfactory cleaning results with your Cove dishwasher? Several factors could contribute to this issue․ First, ensure proper loading techniques are employed – avoid overcrowding and blockages that prevent water circulation․ Dishes should face the spray arms, and large items shouldn’t obstruct the detergent dispenser;
Next, verify you’re using the correct type and amount of detergent․ Using insufficient detergent or an expired product will compromise cleaning effectiveness․ Also, check the rinse aid level; it aids in drying and prevents water spots, contributing to a cleaner appearance․ Inspect the spray arms for clogs or damage, as blocked arms reduce water pressure․
Finally, a dirty filter significantly impacts performance․ Regularly clean the filter to remove food particles and debris․ If issues persist, consider running a dishwasher cleaner cycle to eliminate buildup and restore optimal cleaning power․
Leaking Issues
Discovering a leak from your Cove dishwasher requires immediate attention․ Begin by inspecting the water supply connection and drain hose for any signs of looseness or damage․ Ensure clamps are securely fastened and hoses are free from cracks or kinks․ Check the door gasket for proper sealing; a worn or damaged gasket can allow water to escape during operation․
Examine the area around the detergent dispenser and rinse aid compartment for overflows․ Overfilling these compartments can lead to leakage․ Inspect the spray arms for cracks or loose connections, as these can also cause water to spray outside the dishwasher tub․
If the leak originates from underneath the dishwasher, it could indicate a problem with the internal plumbing or a faulty pump․ In such cases, professional service is recommended to diagnose and repair the issue safely and effectively․
Error Codes and Their Meanings

Cove dishwashers utilize error codes to signal specific malfunctions, aiding in efficient troubleshooting․ A flashing error code on the control panel indicates a problem requiring attention․ While specific codes vary by model, common errors include:
“E1” or “Water Inlet Error” suggests a problem with the water supply – check the water valve and inlet hose․ “E2” or “Drainage Error” indicates a blockage in the drain hose or a malfunctioning drain pump․ “E3” or “Temperature Error” points to a heating element issue or a faulty temperature sensor․
“E4” or “Detergent Dispenser Error” suggests a problem with the dispenser mechanism․ “E5” or “Communication Error” may indicate an internal electronic fault․ Refer to your specific model’s manual for a complete list of error codes and recommended solutions․ If an error persists after attempting basic troubleshooting, contact authorized Cove service for assistance․

Advanced Features & Settings
Explore Cove’s innovative features like Delay Start and the Sanitize cycle, optimizing cleaning performance and convenience for specialized dishwashing needs and preferences․
Delay Start Function
The Delay Start function allows you to schedule your Cove dishwasher to begin a wash cycle at a later, more convenient time․ This is particularly useful for taking advantage of off-peak energy rates or ensuring dishes are clean just before you need them․ To activate the Delay Start, first select your desired wash cycle and options․ Then, press and hold the “Delay Start” button․

The display will begin to count up, indicating the number of hours until the cycle begins․ Each press of the button will typically increase the delay in one or two-hour increments, up to a maximum delay time (often 24 hours – consult your specific model’s manual for confirmation); Once you’ve set the desired delay, simply release the button․ The dishwasher will automatically start the cycle at the programmed time․ Remember to ensure the dishwasher door is securely latched for the delay to function correctly․ This feature provides flexibility and energy savings, adapting to your lifestyle․
Sanitize Cycle Operation
The Sanitize cycle on your Cove dishwasher utilizes heightened water temperatures to eliminate 99․9% of common household bacteria․ This cycle is ideal for items like baby bottles, cutting boards, and dishes used during illness․ To initiate the Sanitize cycle, select it from the available wash cycle options on the control panel․ Note that this cycle typically extends the wash time and uses more energy due to the increased heating requirements․
During the Sanitize cycle, the dishwasher heats the water to a significantly higher temperature than in standard cycles – usually around 150°F (66°C)․ This elevated temperature, combined with a thorough wash and rinse, ensures effective bacteria reduction․ It’s crucial to use a detergent specifically formulated for sanitizing when employing this cycle for optimal results․ Always check your model’s manual for specific temperature details and recommended detergents․ This cycle provides peace of mind regarding hygiene and cleanliness․
Hard Food Disposal Tips
Properly disposing of hard food particles is crucial for maintaining your Cove dishwasher’s performance and preventing clogs․ Avoid sending large bones, fruit pits, or excessively fibrous materials like corn husks down the drain․ These items can accumulate in the drain pump or filter, leading to reduced drainage and potential damage․

Before loading dishes, scrape off as much solid food waste as possible into the trash or garbage disposal․ For smaller, unavoidable particles, the dishwasher’s filter system is designed to capture them․ However, regular filter cleaning is essential to prevent buildup․ Consider pre-rinsing heavily soiled items, especially those with baked-on food, to minimize the strain on the dishwasher․ Ignoring these tips can lead to costly repairs and diminished cleaning effectiveness․ Prioritize preventative measures for a long-lasting, efficient appliance․