Discover the growing interest in homemade wood lathes as a cost-effective, customizable solution for woodworking. Learn how to create functional, versatile tools using simple materials like plywood, steel rods, and bearings. Explore plans that offer variable speed control and 3D-printed components for enhanced precision and efficiency. Perfect for crafting bowls, pens, and more, these DIY projects empower woodworkers to take control of their creations with ease.
1.1 What is a Wood Lathe?
A wood lathe is a machine used to shape and carve wooden objects by rotating them around a central axis. It consists of a motor, spindle, and bed, allowing woodworkers to create symmetrical items like bowls, pens, and table legs. Unlike metal lathes, wood lathes require less power and simpler tools, making them more accessible for homemade constructions. This versatile tool is essential for woodworking projects, enabling precise and artistic transformations of raw wood into functional or decorative pieces.
1.2 Benefits of Building Your Own Wood Lathe
Building your own wood lathe offers numerous advantages, including cost savings, customization, and the ability to tailor the design to your specific woodworking needs. Homemade lathes allow you to work with materials like plywood and steel rods, making them affordable and accessible. This project also enhances your woodworking skills and understanding of machine mechanics. Additionally, it provides the satisfaction of creating a functional tool from scratch, empowering you to craft unique wooden items with precision and creativity.
1;3 Overview of DIY Wood Lathe Plans
DIY wood lathe plans offer detailed step-by-step guides for constructing a functional woodworking tool at home. These plans often include materials lists, 3D CAD models, and video tutorials, making them accessible to both beginners and experienced woodworkers. Many designs incorporate recycled materials, such as washing machine motors, and feature customizable options like variable speed control. Free PDF plans are widely available, providing instructions for building lathes capable of turning bowls, pens, and other wooden items with precision and ease.
Materials and Tools Needed
Gather essential materials like plywood, steel rods, bearings, and pulleys. Tools include a drill press, saw, and 3D printer for custom parts. Basic woodworking tools suffice for assembly.
2.1 Essential Materials for Building a Wood Lathe
Constructing a homemade wood lathe requires durable materials such as plywood, steel rods, and high-quality bearings for smooth operation. A sturdy motor, like one from a washing machine, serves as the power source. Additional components include pulleys, belts, and a spindle. Wood blocks or 3D-printed parts can be used for custom fittings. Ensure all materials are readily available at hardware stores or salvaged from scrap. Proper material selection ensures stability, precision, and longevity of your DIY wood lathe.
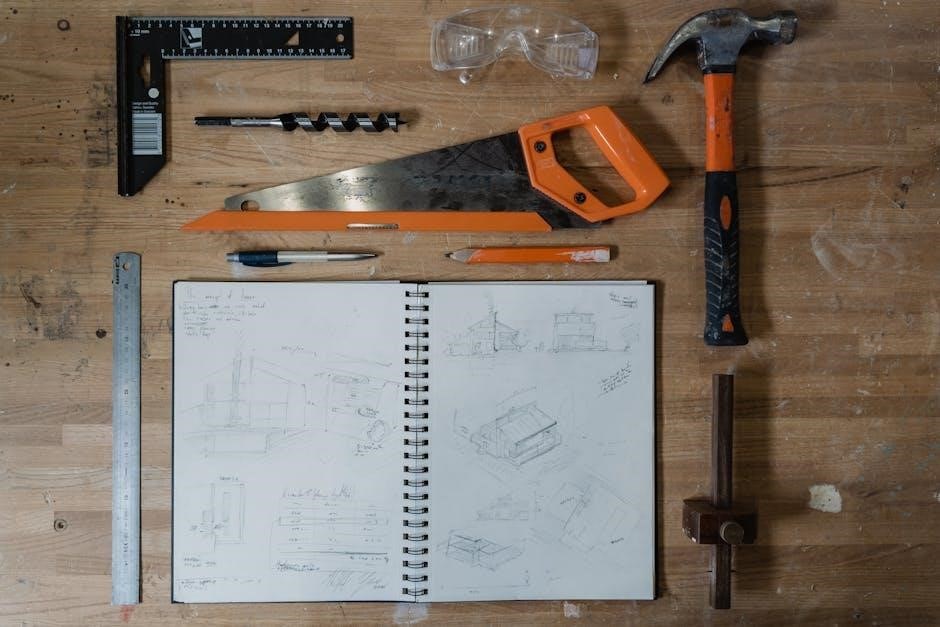
2.2 Tools Required for Assembly
To assemble a homemade wood lathe, essential tools include a drill press, angle grinder, and welder for metalwork. A table saw and sanders are necessary for shaping wood components. A 3D printer can be useful for creating custom bearings or fittings. Basic hand tools like wrenches, screwdrivers, and clamps are also vital. For precise alignment, a laser level or truing tool is recommended. These tools ensure accurate assembly and proper functionality of your DIY wood lathe, enabling you to achieve professional-grade results.
2.3 Alternative Materials for Cost-Effective Construction
For a budget-friendly homemade wood lathe, consider using plywood or recycled wood for the frame and bed. Steel rods and bearings can be sourced from hardware stores or salvaged from old machinery. 3D-printed components, such as bearing blocks, offer a cost-effective alternative to metal parts. Additionally, using a washing machine motor and repurposed pulleys can significantly reduce expenses. These materials ensure durability and functionality while keeping costs low, making your DIY project more accessible and sustainable.

Step-by-Step Guide to Building the Lathe
Start by preparing your workspace and tools. Assemble the lathe frame using plywood and steel rods, then install bearings for smooth operation. Mount the motor, add pulleys, and connect the speed controller. Finally, test the lathe with scrap wood to ensure proper functionality before tackling actual projects. This straightforward process ensures a functional and precise homemade wood lathe.
3.1 Preparing the Workspace and Tools
Begin by clearing and organizing your workspace to ensure safety and efficiency. Gather essential tools like a drill press, saw, and wrenches. Collect materials such as plywood, steel rods, bearings, and pulleys. If available, use a 3D printer for custom parts like bearing blocks or pulleys. Otherwise, opt for wooden alternatives or sourced metal components from junkyards. Ensure all components are measured accurately and within reach. Wear safety gear, including gloves and goggles, to protect yourself during assembly. A well-prepared workspace and tools are crucial for a smooth building process.
3.2 Assembling the Lathe Components
Start by assembling the lathe’s main components, such as the headstock, tailstock, and bed. Use steel rods and bearings to ensure stability and smooth operation. Attach the spindle and pulley system, ensuring proper alignment. If using a washing machine motor, secure it firmly to the headstock. Wooden or 3D-printed parts, like bearing blocks, can be integrated for added precision. Tighten all connections carefully to avoid misalignment. Ensure the tailstock can move freely along the bed for accurate wood turning. Double-check all parts for proper fit and alignment before proceeding.
3.3 Installing the Motor and Speed Controller
Mount the motor securely to the headstock, ensuring proper alignment with the spindle. Connect the motor to the speed controller, following the manufacturer’s wiring diagram. Use pulleys and belts to transfer power from the motor to the spindle, allowing for variable speed adjustments. Ensure all connections are tight and properly insulated for safe operation. Test the motor and speed controller at low speed to confirm smooth functionality before full operation. This setup provides precise control over the lathe’s rotation, essential for woodworking projects.
3.4 Testing the Lathe for Proper Functionality
Once assembled, test the lathe by running it at low speed to ensure smooth operation. Check the motor and speed controller for consistent performance. Mount a small, balanced wood piece and observe its rotation for wobble or vibration. Ensure the spindle and tailstock align properly. Test the speed variability to confirm it adjusts correctly. Inspect all bolts and bearings for tightness. Finally, attempt a simple project, like turning a small bowl or pen, to verify the lathe’s functionality and accuracy. This step ensures safety and readiness for more complex tasks.
Design Considerations
Consider size, customization, and advanced features when designing your homemade wood lathe. Ensure the lathe fits your workspace and project needs, allowing for versatility in woodturning tasks.
4.1 Choosing the Right Size for Your Lathe
Selecting the appropriate size for your homemade wood lathe is crucial for functionality and ease of use. Consider the maximum diameter and length of wood you plan to work with, as well as your available workspace. A lathe designed for pieces up to 4 inches in diameter and 30 inches long is ideal for most woodworking projects, such as turning bowls or pens. Avoid overly large designs, as they may be cumbersome and unnecessary for typical tasks. Ensure the size aligns with your specific needs and skill level for optimal performance and safety.
4.2 Customizing the Design for Specific Needs
Customizing your homemade wood lathe allows you to tailor it to your woodworking projects. Whether you’re crafting pens, bowls, or furniture parts, adapt the design to suit your needs. Consider adding variable speed control for precision or integrating 3D-printed components for enhanced functionality. Use materials like plywood, steel rods, and bearings to create a sturdy yet versatile tool. By modifying the size and features, you can ensure your lathe meets specific requirements, making it ideal for both small-scale and complex woodworking tasks.
4.3 Incorporating Advanced Features
Incorporate advanced features to enhance your homemade wood lathe’s functionality. Consider adding variable speed control for precise adjustments and smoother operations. Integrate 3D-printed components, such as custom pulleys or bearing blocks, for improved durability and performance. You can also add a sliding carriage or advanced chuck systems for better workpiece handling. These upgrades allow for more complex projects, such as intricate turnings or large-scale woodworking. By incorporating these features, you can create a highly efficient and versatile tool tailored to your woodworking needs.

Safety Tips and Precautions
Always wear protective gear, including safety glasses and gloves, when operating a homemade wood lathe. Ensure proper tool handling and avoid loose clothing that could catch. Regularly inspect the lathe for vibrations or misalignment, and keep work areas clean. Never leave the lathe unattended while in operation. Follow safety guidelines to prevent accidents and ensure a secure woodworking experience.
5.1 General Safety Guidelines
Always prioritize safety when working with a homemade wood lathe. Wear protective eyewear, gloves, and ensure loose clothing is secured. Keep long hair tied back and avoid jewelry that could catch. Maintain a clean workspace, free from clutter, to prevent accidents. Regularly inspect the lathe for proper alignment and balance to minimize vibrations. Never operate the lathe while fatigued or distracted. Ensure all tools are handled correctly, and be aware of potential hazards like flying wood chips. Proper training and caution are essential for safe operation.
5.2 Best Practices for Operating the Lathe
Always use the correct cutting tools and maintain proper posture to avoid strain. Keep the tool rest adjusted close to the workpiece for better control and stability. Avoid overreaching or leaning over the lathe while it’s in operation. Start with lower speeds for rough shaping and gradually increase as needed. Ensure the workpiece is securely mounted to prevent slippage. Maintain consistent, gentle pressure on the tool to achieve smooth results. Regularly inspect the lathe and tools for wear or damage to ensure optimal performance and safety.
5.3 Handling Common Hazards
When operating a homemade wood lathe, prioritize safety to avoid accidents. Always wear protective gear like safety glasses and gloves to shield against flying debris. Ensure loose clothing or long hair is tied back to prevent entanglement. Keep the workpiece securely mounted to avoid slippage and maintain a firm grip on tools to prevent slippage. Regularly inspect the lathe and tools for wear or damage. Avoid distractions and keep children and pets away while working. Never reach over rotating parts and stay focused to ensure safe operation. Follow these practices to minimize risks and prevent injuries.

Advanced Features and Modifications
Enhance functionality by adding variable speed control, upgrading motors, or incorporating 3D-printed components. Customize your lathe with advanced accessories for improved precision and versatility in woodworking projects.
6.1 Adding Variable Speed Control
Add variable speed control to your homemade wood lathe for smoother operation and precise adjustments. Use a washing machine motor paired with a variable speed controller for effortless speed changes. Download free PDF plans that include detailed instructions and measurements. Access 3D CAD models for custom components and watch video tutorials for a step-by-step guide. This modification enhances versatility, allowing you to tackle various woodworking projects with greater control and accuracy, from crafting pens to bowls.
6.2 Upgrading the Lathe with Additional Accessories
Enhance your homemade wood lathe by adding practical accessories for improved functionality. Consider integrating a drill press spindle for drilling operations or a straight-line attachment for precise cutting. Utilize bearings and pulleys for smoother performance. Explore 3D-printed or custom-made components, such as chuck systems or leveling devices, to enhance accuracy. Free PDF plans often include designs for these upgrades, allowing you to expand your lathe’s capabilities. These modifications enable you to tackle a wider range of woodworking projects with greater efficiency and precision.
6.3 Enhancing Precision and Stability
Improve your homemade wood lathe’s performance by focusing on precision and stability. Use 3D-printed bearing blocks or wooden alternatives for smooth operation. Ensure proper alignment of the spindle and headstock to minimize vibrations. Incorporate a rigid frame design using steel rods and crossmembers for added stability. Upgrade with a digital readout for accurate measurements. Consider adding adjustable feet for leveling on uneven surfaces. These enhancements will allow for finer control and consistent results, making your lathe suitable for intricate woodworking projects.

Resources for Homemade Wood Lathe Plans
Access free PDF plans and 3D CAD models for homemade wood lathes online. Explore websites like Mazay DIY and YouTube channels for detailed guides and tutorials.
7.1 Where to Find Free PDF Plans
Free PDF plans for homemade wood lathes are widely available online. Websites offer detailed step-by-step guides, often downloadable after a simple checkout process. YouTube channels like Mazay DIY provide comprehensive plans with measurements and video tutorials. Additionally, forums and woodworking communities share plans, including 3D CAD models for advanced customization. These resources cater to all skill levels, ensuring enthusiasts can build functional and precise lathes for various woodworking projects, from pens to table legs, with ease and affordability.
7.2 Recommended Websites and YouTube Channels
Several websites and YouTube channels offer excellent resources for homemade wood lathe plans. Mazay DIY and similar channels provide detailed tutorials and free PDF plans with measurements. Forums like Woodworking Talk and Reddit’s r/woodworking communities share user experiences and plans. Additionally, channels like Stanislaw Nosow showcase creative builds. These platforms offer a wealth of knowledge, from basic designs to advanced modifications, helping enthusiasts refine their woodworking skills and create functional lathes tailored to their needs.
7.3 Downloading 3D CAD Models
For precise customization, 3D CAD models are available for download, enabling users to 3D print components like bearing blocks and pulleys. Channels like Mazay DIY offer these models, ensuring accurate measurements and designs. If a 3D printer isn’t accessible, wood alternatives can be crafted. These models streamline the building process, allowing for tailored lathe construction with enhanced precision and durability, ideal for homemade woodworking projects.

Troubleshooting Common Issues
Addressing vibrations, motor malfunctions, and alignment problems is crucial. Check bearings, tighten components, and ensure proper balance to maintain functionality and safety while operating your homemade wood lathe.
8.1 Identifying and Fixing Vibrations
Vibrations in a homemade wood lathe often stem from imbalanced components or loose fittings. Check the motor mount, spindle alignment, and workpiece balance. Tighten all bolts and ensure the lathe bed is level. If vibrations persist, consider adding damping materials like rubber pads or using a balancing kit. Proper alignment of pulleys and belts can also mitigate the issue. Regularly inspect bearings and replace worn-out parts to maintain smooth operation and prevent damage to your projects.
8.2 Resolving Motor and Speed Control Problems
Motor and speed control issues can disrupt your woodworking projects. Start by checking electrical connections and ensuring the power supply matches the motor’s requirements. If the motor overheats, reduce the workload or install a cooling system. For speed control problems, verify the controller’s settings and ensure proper belt alignment. If issues persist, consider upgrading to a variable speed controller or consulting the motor’s manual. Regular maintenance and lubrication of moving parts can prevent such problems and ensure smooth operation of your homemade wood lathe.
8.3 Adjusting Alignment and Balance
Proper alignment and balance are crucial for smooth operation. Start by ensuring the lathe bed and headstock are perfectly aligned using shims or adjustment bolts. Check the spindle for levelness and tighten all components securely. If vibrations occur, inspect the motor mount and spindle bearings for proper alignment. Use a spirit level to verify balance and adjust as needed. Regularly check and tighten all bolts to maintain stability. Proper alignment prevents vibrations and ensures accurate woodturning results, extending the lifespan of your homemade wood lathe.
Building a homemade wood lathe is a rewarding DIY project that empowers woodworkers to create unique, personalized pieces with precision and creativity, inspiring future woodworking endeavors.
9.1 Final Thoughts on Building a Homemade Wood Lathe
Building a homemade wood lathe is a fulfilling project that combines creativity and practicality. It allows woodworkers to craft custom tools tailored to their needs, fostering a sense of accomplishment. By using readily available materials like plywood, steel rods, and bearings, DIY enthusiasts can create a functional and versatile lathe. The ability to add features such as variable speed control enhances its utility. This project not only saves money but also empowers creators to take full control of their woodworking endeavors, making it a rewarding experience for all skill levels.
9.2 Encouragement for DIY Enthusiasts
Embrace the rewarding journey of building your own wood lathe! DIY projects like this offer a sense of accomplishment and empower creators to bring their woodworking visions to life. With detailed plans and resources available, even beginners can achieve success. Don’t be intimidated by the process—every step is an opportunity to learn and grow. Whether you’re crafting pens, bowls, or custom furniture, this project will enhance your woodworking skills and inspire future creations. Dive in, stay creative, and enjoy the satisfaction of making something truly your own!
9.3 Next Steps for Woodworking Projects
With your homemade wood lathe complete, it’s time to explore exciting woodworking projects! Start with simple items like bowls, pens, or table legs to refine your skills. As confidence grows, tackle more complex designs, such as intricate vases or custom furniture parts. Experiment with different wood types and techniques to expand your creativity; Consider adding advanced features to your lathe, like variable speed control, to enhance precision. Remember, practice is key, and every project is an opportunity to innovate and improve your craftsmanship.