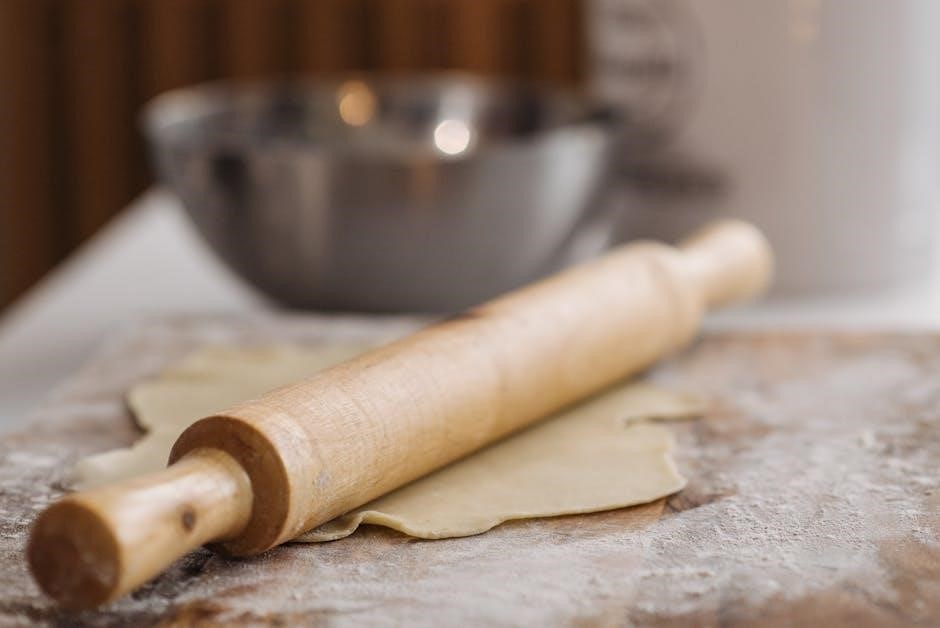
rolling pin guides
Rolling pin guides are essential tools for achieving consistent dough thickness, ensuring uniform baking results. They come in various materials and designs, catering to different baking needs and preferences.
What Are Rolling Pin Guides?
Rolling pin guides are tools designed to help achieve consistent dough thickness while rolling. They typically consist of adjustable or fixed rings, bands, or spacers that fit on the rolling pin, ensuring even pressure and uniform results. These guides prevent dough from becoming too thin or thick, making baking more precise and professional. Available in various materials like wood, metal, silicone, or DIY solutions, they cater to different preferences and needs. Whether for baking, ceramics, or crafts, rolling pin guides enhance accuracy and simplify the rolling process, ensuring perfect consistency every time.
Importance of Consistent Dough Thickness
Consistent dough thickness is crucial for achieving uniform baking results. Uneven thickness can lead to undercooked or overcooked areas, affecting texture and appearance. Rolling pin guides ensure that dough is rolled to a precise, even layer, promoting consistent baking and better flavor distribution. This uniformity is especially vital in professional settings, such as bakeries and restaurants, where presentation and quality are paramount. By maintaining consistent thickness, bakers can produce high-quality pastries, cookies, and other baked goods with ease and reliability, making rolling pin guides an indispensable tool in both home and commercial kitchens.
Basic Types of Rolling Pin Guides
Rolling pin guides come in various forms to suit different baking needs. The most common types include adjustable plastic or metal rings that fit onto the rolling pin, allowing precise control over dough thickness. Silicone guides are flexible and easy to clean, while wooden dowels provide a traditional, durable option. Some guides are designed as fixed spacers, offering simplicity for home bakers. Additionally, custom and 3D-printed guides cater to specific requirements, such as intricate designs or specialized dough types. Each type ensures even thickness, enhancing the baking process for both novice and experienced bakers.
Materials and Designs
Rolling pin guides are crafted from various materials, including wood, metal, silicone, and plastic, each offering unique benefits. Designs range from adjustable rings to fixed spacers, ensuring versatility for different baking needs.
Traditional Wood and Metal Guides
Traditional rolling pin guides, often made from wood or metal, are timeless choices for achieving consistent dough thickness. Wooden guides, like handcrafted dowels, offer a natural, sustainable option, while metal guides provide durability and precision. These materials have been trusted for generations, offering a smooth rolling experience and maintaining even pressure. Wooden guides are particularly valued for their aesthetic appeal and ease of use, while metal guides are prized for their longevity and ability to withstand heavy use. Both options ensure that dough is rolled evenly, making them indispensable tools for professional and home bakers alike.
Modern Silicone and Plastic Options
Modern rolling pin guides made from silicone and plastic offer flexibility and ease of use. Silicone guides are soft, colorful, and slip-resistant, making them easy to attach and detach. Plastic guides are lightweight, durable, and often adjustable, providing precise control over dough thickness. These materials are easy to clean and maintain, making them hygienic choices for frequent use. Silicone guides are particularly heat-resistant, while plastic ones are often dishwasher-safe. Both options are versatile for various dough types, from delicate pastries to thick bread dough, ensuring consistent results for home bakers and professionals alike.
Custom and DIY Rolling Pin Guides
Custom and DIY rolling pin guides allow bakers to tailor their tools to specific needs. DIY enthusiasts can craft guides using materials like wood, acrylic, or 3D printing. These personalized tools enable precise thickness control, catering to unique dough types or project requirements. For instance, laser-cut acrylic guides or hand-turned wooden rings provide a snug fit for individual rolling pins. DIY tutorials often include step-by-step instructions for measuring, marking, and assembling guides. This approach not only enhances functionality but also adds a personal touch to baking, making it a rewarding and creative process for home bakers and professionals seeking customized solutions.
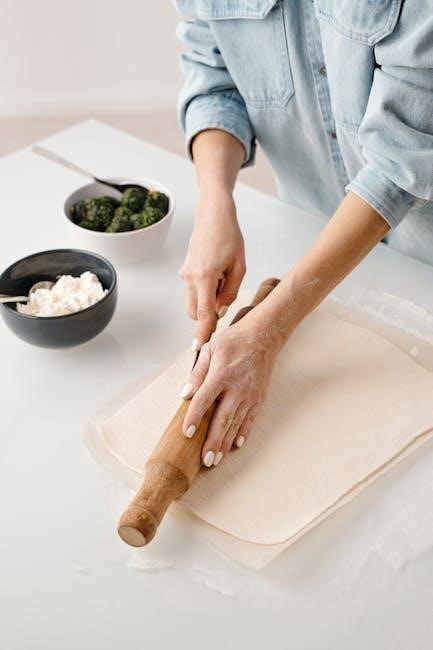
Using Rolling Pin Guides
Rolling pin guides simplify achieving even dough thickness. Measure and mark the pin, set the guides, and roll evenly. They ensure consistent results for baking and cooking tasks.
Measuring and Marking the Rolling Pin
Measuring and marking the rolling pin is the first step in using guides effectively. Determine the desired dough thickness and mark the rolling pin accordingly. This ensures that the guides can be set to the correct height, providing a consistent thickness across the dough. Use a ruler or caliper to make precise measurements, and lightly mark the pin with a pencil or marker. This step is crucial for achieving uniform results, especially when working with sensitive dough types or specific recipes that require exact measurements. Proper marking ensures that the guides function as intended, making the rolling process efficient and stress-free. Accurate measurements prevent over- or under-rolling, which can affect the final texture and appearance of baked goods. By taking the time to measure and mark carefully, bakers can maintain control over their dough, leading to professional-grade outcomes. This initial preparation is foundational for successful use of rolling pin guides in both home and professional settings. Consistency starts with precise measurements, ensuring that every batch meets expectations. Whether for cookies, pastries, or other dough-based creations, accurate markings on the rolling pin are essential for achieving the desired thickness and uniformity. This simple yet critical step sets the stage for flawless rolling and baking experiences. Bakers of all levels will find that this practice enhances their skills and delivers consistent, high-quality results.
Setting Up the Guides for Even Thickness
Setting up rolling pin guides involves placing them on either side of the dough to maintain uniform thickness. Ensure the guides are evenly spaced and parallel to the rolling surface. For precise control, align the guides with the edges of the dough or use measured markings on the rolling pin. Adjust the guides to the desired thickness, taking care not to compress the dough unevenly. This setup prevents over-rolling in some areas while under-rolling in others. Use a gentle, consistent motion with the rolling pin, allowing the guides to regulate the pressure. Properly set guides eliminate guesswork, ensuring a professional finish. This method is especially useful for delicate doughs or when achieving specific textures is crucial. By following these steps, bakers can effortlessly roll out dough to the perfect thickness every time, making it easier to achieve consistent, high-quality results in both sweet and savory recipes. Even thickness ensures even baking, which is essential for the final texture and appearance of pastries, cookies, and other baked goods. Setting up the guides correctly is a simple yet effective way to elevate baking skills and deliver professional-grade outcomes.
Tips for Preventing Dough from Sticking
Preventing dough from sticking is crucial for smooth rolling. Lightly dust the rolling pin and surface with flour or cornstarch to reduce friction. Clean the pin thoroughly before use to remove residue. Use rolling pin guides to maintain even pressure, avoiding excessive force that can cause sticking. Chill dough beforehand to firm it up, making it less prone to sticking. For delicate doughs, consider using a silicone mat or parchment paper. Dusting the dough with a small amount of powdered sugar or cocoa (for chocolate dough) can also help. Regularly flipping the dough ensures even moisture distribution, preventing it from adhering to surfaces. These simple tips ensure a hassle-free rolling experience, keeping your dough intact and your baked goods flawless.
DIY Rolling Pin Guides
DIY rolling pin guides offer a creative way to achieve precise dough thickness. Crafted from materials like wood or 3D-printed designs, they empower bakers to customize their tools for perfect results.
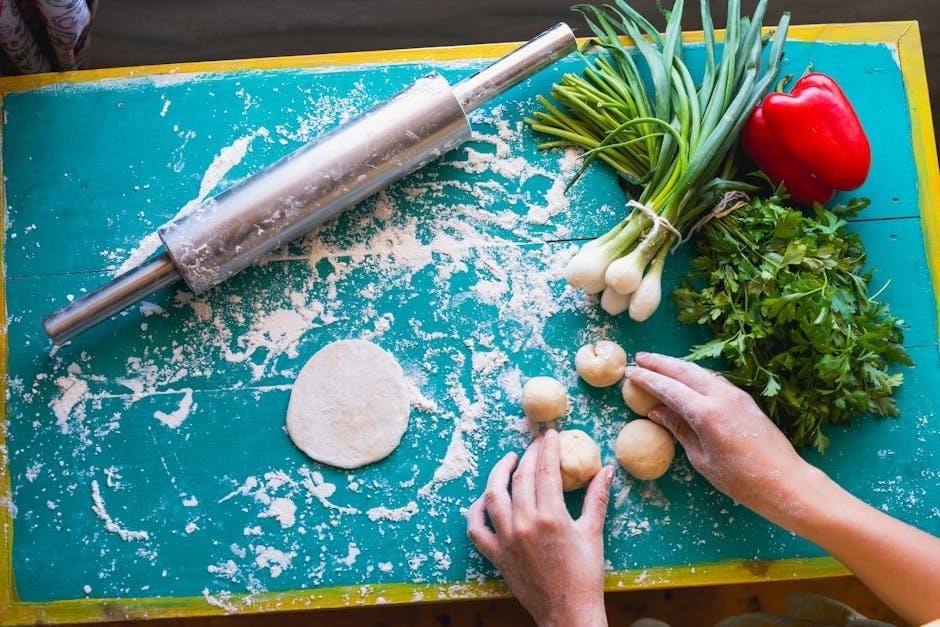
Step-by-Step Guide to Making Your Own Guides
Creating your own rolling pin guides is a straightforward process that enhances baking precision. Start by measuring your rolling pin’s diameter to ensure a snug fit for the guides. Next, choose materials like wood, metal, or silicone based on durability and flexibility. For wood, cut rings to desired thicknesses and sand them smooth. For silicone, mold or purchase bands that slip onto the pin. Once crafted, place the guides on the rolling pin, ensuring even dough thickness. This DIY approach allows customization, making it ideal for bakers seeking consistency in their recipes.
Tools and Materials Needed
To craft your own rolling pin guides, you’ll need materials like wood, metal, or silicone. For wood, use a saw to cut rings to your desired thickness. Sand them smooth for a polished finish. Metal guides can be made with tubing cut to size. Silicone options can be molded or purchased as slip-on bands. Tools include a measuring tape, a saw or cutter, sandpaper, and a drill for adjustments. Optional items like a 3D printer allow for custom designs. Ensure all materials fit your rolling pin snugly for even dough thickness. Proper tools and materials ensure accuracy and durability in your guides.
Troubleshooting Common Issues
When using rolling pin guides, common issues include uneven thickness and guides slipping. To fix unevenness, ensure guides are securely attached and dough is at room temperature. For slipping, lightly sand the inner surface of the guides for better grip. If dough sticks, dust guides with flour or powder. Misaligned guides can be adjusted by loosening and repositioning them. For homemade guides, check measurements for accuracy and adjust as needed. Regular cleaning and proper storage prevent damage. Addressing these issues ensures consistent results and extends the life of your rolling pin guides.
Expert Tips and Tricks
Master even dough rolling by using guides with dowels for uniform thickness. Prevent sticking with floured surfaces and adjust guides for precise control, ensuring professional results every time.
Mastering the Art of Even Dough Rolling
Mastering even dough rolling is key to achieving professional baking results. Rolling pin guides help maintain consistent thickness, ensuring uniform baking and texture. Start by measuring and marking your rolling pin to desired thickness. Use guides to prevent uneven rolling, especially for delicate doughs. Lightly flour surfaces to avoid sticking. For best results, roll in one direction, applying even pressure. Adjust guides as needed for different dough types. Practice makes perfect—soon, you’ll achieve flawless, evenly rolled dough every time, elevating your baked goods to new heights. Consistency is the foundation of exceptional baking.
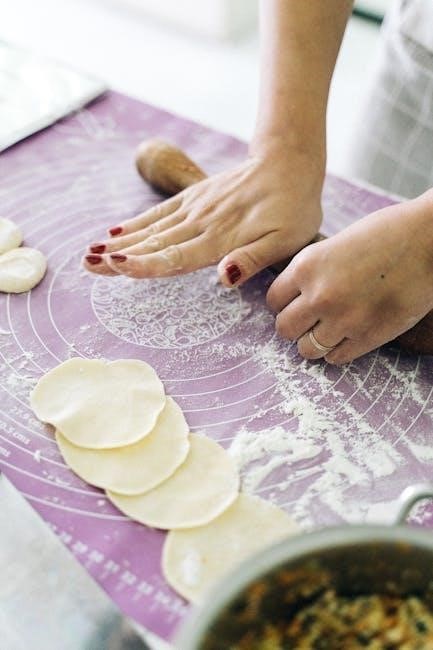
Using Guides for Different Dough Types
Rolling pin guides are versatile tools that cater to various dough types, ensuring consistent results. For delicate pastries, thinner guides maintain a light texture, while thicker settings are ideal for hearty bread dough. Fondant and pie dough benefit from precise control to avoid tearing. Adjust guide thickness based on dough elasticity and desired finish. Silicone or plastic guides are easier to clean and prevent sticking, making them perfect for sticky doughs like pasta or cookie batter. By tailoring guide settings to dough types, bakers achieve uniform thickness and texture, enhancing both appearance and flavor in every creation.
Advanced Techniques for Professional Results
For professional bakers, mastering advanced techniques with rolling pin guides ensures precision and consistency. Adjust guide sizes to accommodate intricate dough designs, such as layered pastries or delicate fondant. Utilize multiple guides simultaneously to achieve uniform thickness across large dough sheets. Experiment with textured or patterned guides to create decorative finishes. Regularly calibrate guides to maintain accuracy and prevent wear. Incorporating these methods elevates baking to a professional level, delivering flawless results every time. These techniques are indispensable for crafting visually stunning and perfectly textured baked goods, making them a cornerstone of expert baking practices.
Rolling Pin Guides in Professional Settings
Professionals rely on rolling pin guides for precise dough control, ensuring consistent results in bakeries, restaurants, and specialized crafting; They enhance efficiency and quality in high-volume environments, making them indispensable tools for experts seeking perfection in their work.
Commercial Bakeries and Restaurants
Rolling pin guides are indispensable in commercial bakeries and restaurants, where consistency and efficiency are paramount. These tools ensure uniform dough thickness, eliminating human error and saving time. Stainless steel or silicone guides are popular for their durability and ease of cleaning, making them ideal for high-volume kitchens. By maintaining precise control over dough rolled out to specific measurements, bakeries and restaurants can produce consistent, high-quality pastries, bread, and other baked goods. This level of precision not only enhances product quality but also streamlines production processes, making rolling pin guides a vital asset in professional culinary environments.
Ceramics and Craft Applications
Rolling pin guides are widely used in ceramics and craft applications to achieve uniform thickness in clay slabs. These tools are essential for creating consistent, professional-looking pieces. Artists and craftspeople rely on guides to ensure precise measurements, whether for pottery, sculptures, or decorative items. The ability to maintain even thickness simplifies the creation of symmetrical designs and functional ware. Durable materials like metal or silicone make these guides ideal for repeated use in creative projects. They also facilitate efficient workflows, allowing artisans to focus on detailing and finishing techniques. Rolling pin guides are a versatile asset in both ceramic production and various craft endeavors.
Specialized Guides for Specific Tasks
Specialized rolling pin guides cater to specific tasks, offering tailored solutions for precise dough or material handling. These guides are designed for unique applications, such as achieving intricate textures or maintaining exact thickness for delicate pastries. For instance, PME Rolling Pin Guide Rings are ideal for professional icing work, ensuring uniform layers. Similarly, textured guides are used in ceramics to imprint patterns onto clay. Customizable options allow artisans to adapt guides for specific materials or techniques, making them indispensable for both culinary and craft projects. These specialized tools enhance creativity and efficiency, providing expert-level results in diverse applications.
Maintenance and Storage
Regularly clean rolling pin guides with a soft cloth and store them in a dry place to maintain accuracy. Proper care ensures longevity and consistent performance.
Cleaning and Caring for Your Guides
Proper cleaning and maintenance are crucial for extending the life of rolling pin guides. Gently wipe them with a damp cloth after use, avoiding harsh chemicals. For stubborn residue, mix mild soap and warm water, then rinse thoroughly. Dry guides completely before storing to prevent moisture buildup. Regular care ensures they remain accurate and functional, providing consistent results in your baking and crafting projects. Store them in a cool, dry place to maintain their shape and performance over time.
Proper Storage to Maintain Accuracy
Proper storage is essential to maintain the accuracy and longevity of rolling pin guides. After cleaning, ensure guides are completely dry before storing to prevent moisture buildup. Store them in a cool, dry place away from direct sunlight and heat sources, which can warp or bend materials. For silicone or plastic guides, consider using a protective case or bag to avoid scratches. Wooden guides should be kept in a well-ventilated area to prevent warping. Organizing guides by size or thickness can also help prevent damage and ensure they remain ready for precise use in future baking or crafting projects.
Rolling pin guides are indispensable tools for bakers and crafters, offering precision and consistency. Their versatility and ease of use make them a valuable addition to any kitchen or workshop.
Benefits of Using Rolling Pin Guides
Rolling pin guides offer numerous benefits, ensuring consistent dough thickness for uniform baking results. They prevent uneven rolling, reducing waste and enhancing the final product’s quality. By maintaining precise control, guides minimize the risk of dough sticking and simplify the rolling process. Ideal for both professionals and home bakers, they are versatile for various dough types, from pie crusts to pasta. Easy to use and durable, rolling pin guides are a practical investment for achieving professional-grade outcomes in the kitchen, making them an essential tool for anyone seeking precision and consistency in their baking endeavors.